Character Rigging Process
To start rigging a character, first we need to have all of the character elements in separate layers and imported into After Effects. The next step is to position the anchor point of each piece properly.
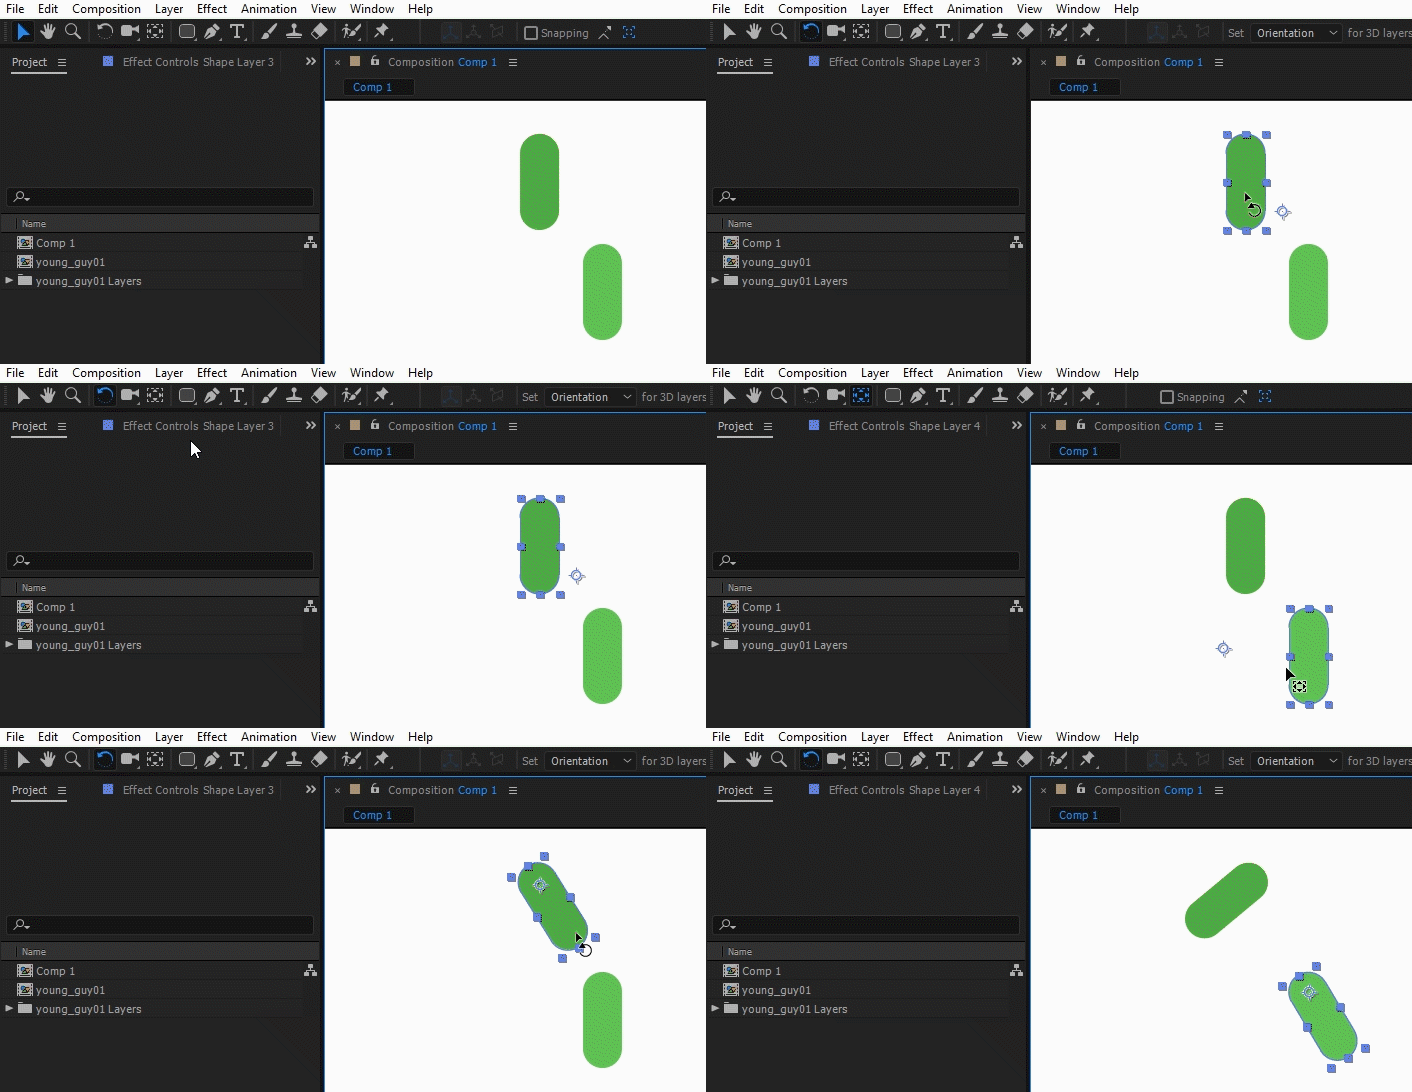
The anchor point is what defines your layer's center of rotation. As an example, the center of rotation of an arm is the shoulder, while the center of rotation of the forearm is the elbow. For this reason it is very important to place the anchor points of your layers properly before you start rigging.
To move the anchor point of a layer, select the layer or object, click the Pan behind tool, then click the anchor point and move it to the desired position.

With the anchor points properly placed, we can decide if we'd like to create an FK or an IK rig.
In the case of Forward Kinematics, we start by parenting the layers to each other (for IK we can skip this step).
To parent one object to another in After Effects, all you need to do is click the pick whip icon and drag from the child layer, to the parent layer. The dropdown next to the pick whip will then show the name of the parent layer:

Once that is done, whenever you rotate or move the parent layer, the child layer will follow.
To create an Inverse Kinematics rig we will create controllers for each part of our character that will be animated. To simplify this process, we will use a free plugin called DUIK.
Here is a step by step of the IK setup process with DUIK (you will need to use your Lynda account to watch these videos):
DUIK Interface
https://www.lynda.com/DUIK-tutorials/Duik-interface-preferences/492721/543492-4.html
IK rigging setup
https://www.lynda.com/DUIK-tutorials/Introduction-IK-rigging/492721/543495-4.html
IK options
https://www.lynda.com/DUIK-tutorials/Effects-panel-options-IK-control-layer/492721/543496-4.html